Adding a Team Member
Due to Airtable's limitations there are several manual actions required to add a new User/Team Member to the Task Base. This process will take 6 simple steps and doesn't require any specific Airtable or coding skills.
1. Add a team member
- From the Task Interface go to Users page, enter the user's name and email (optional)
- Set Admin checkbox if this User is an admin
- It's not recommended to have more than one admin in the base
- The Admin setting affects only the Planning pages of the Task Base Interface. If you don't need the Planning functionality, then you don't need Admin User.

2. Setup the automation for the user's page
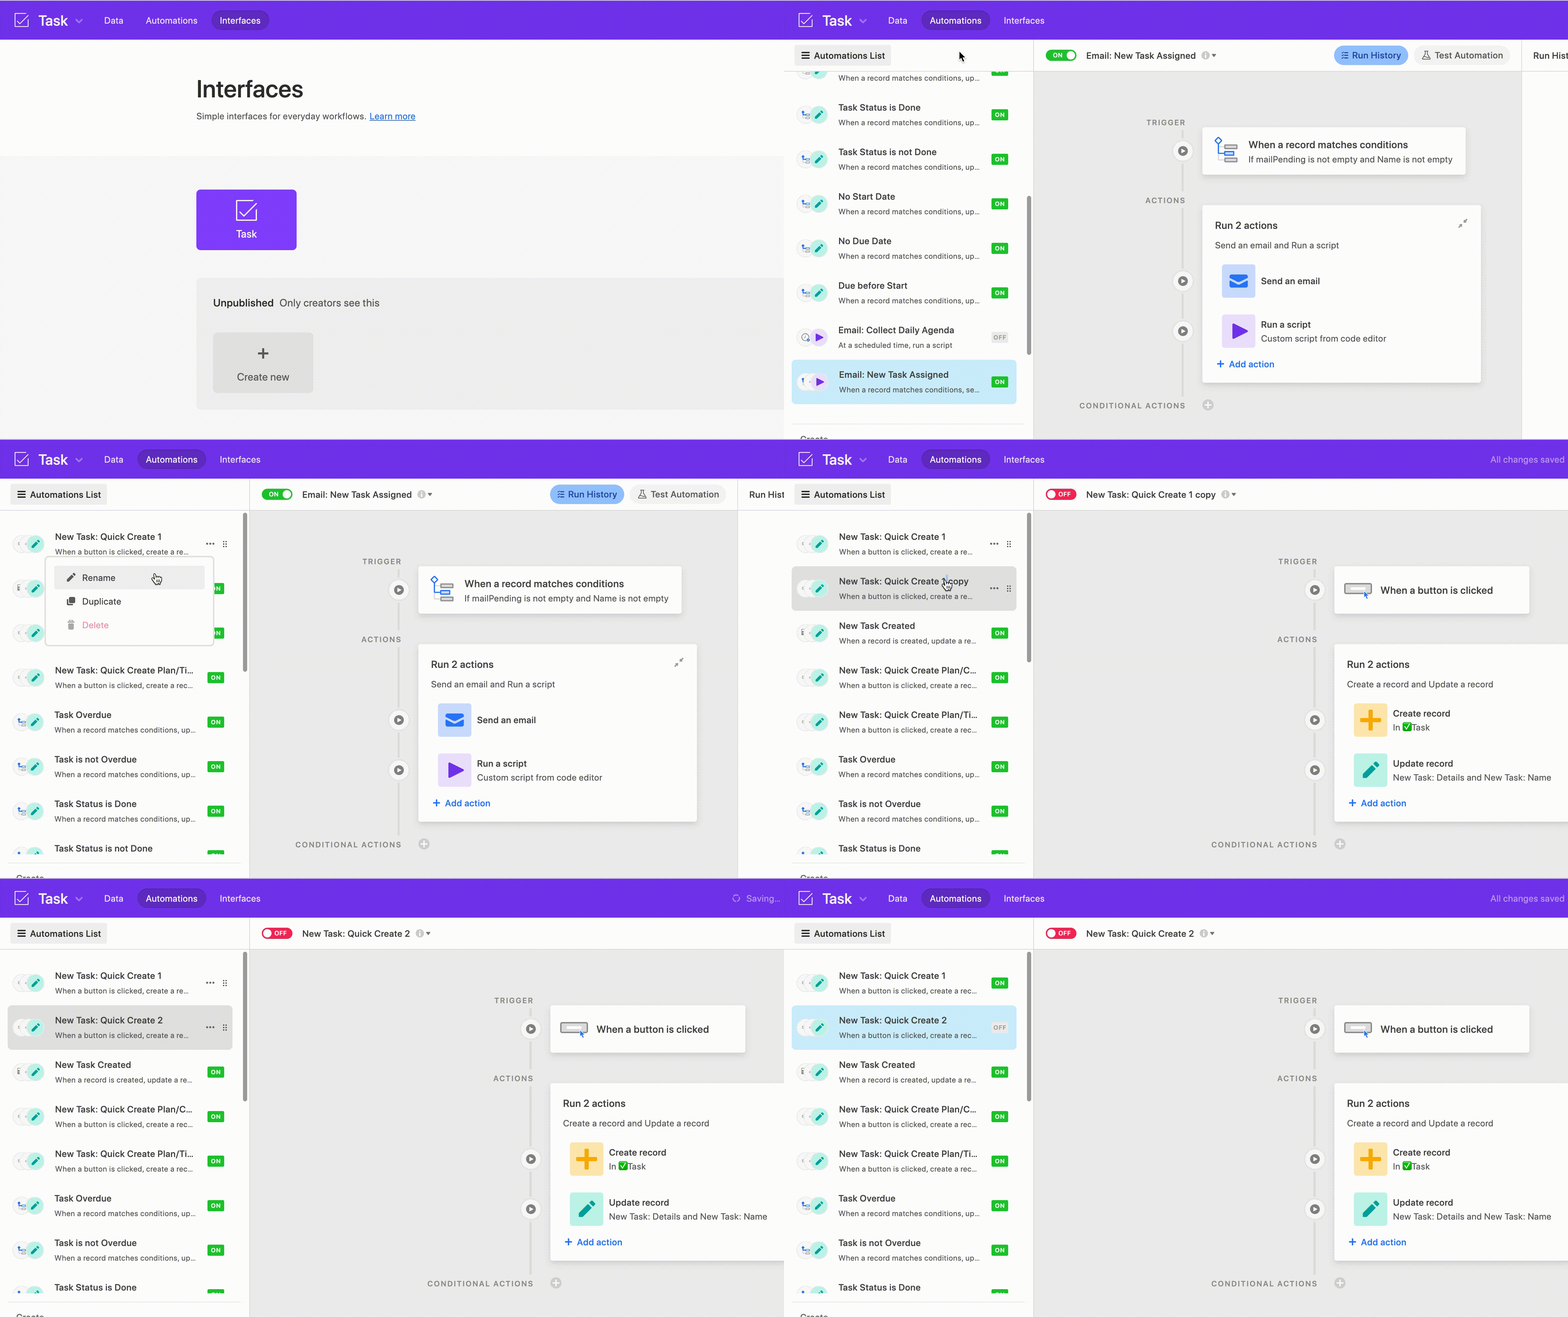
- Go to the base's automations
- Locate the automation named New Task: Quick Create 1
- Right click on it and select Duplicate automation
- Rename new automation if needed
3. Create the new user's page
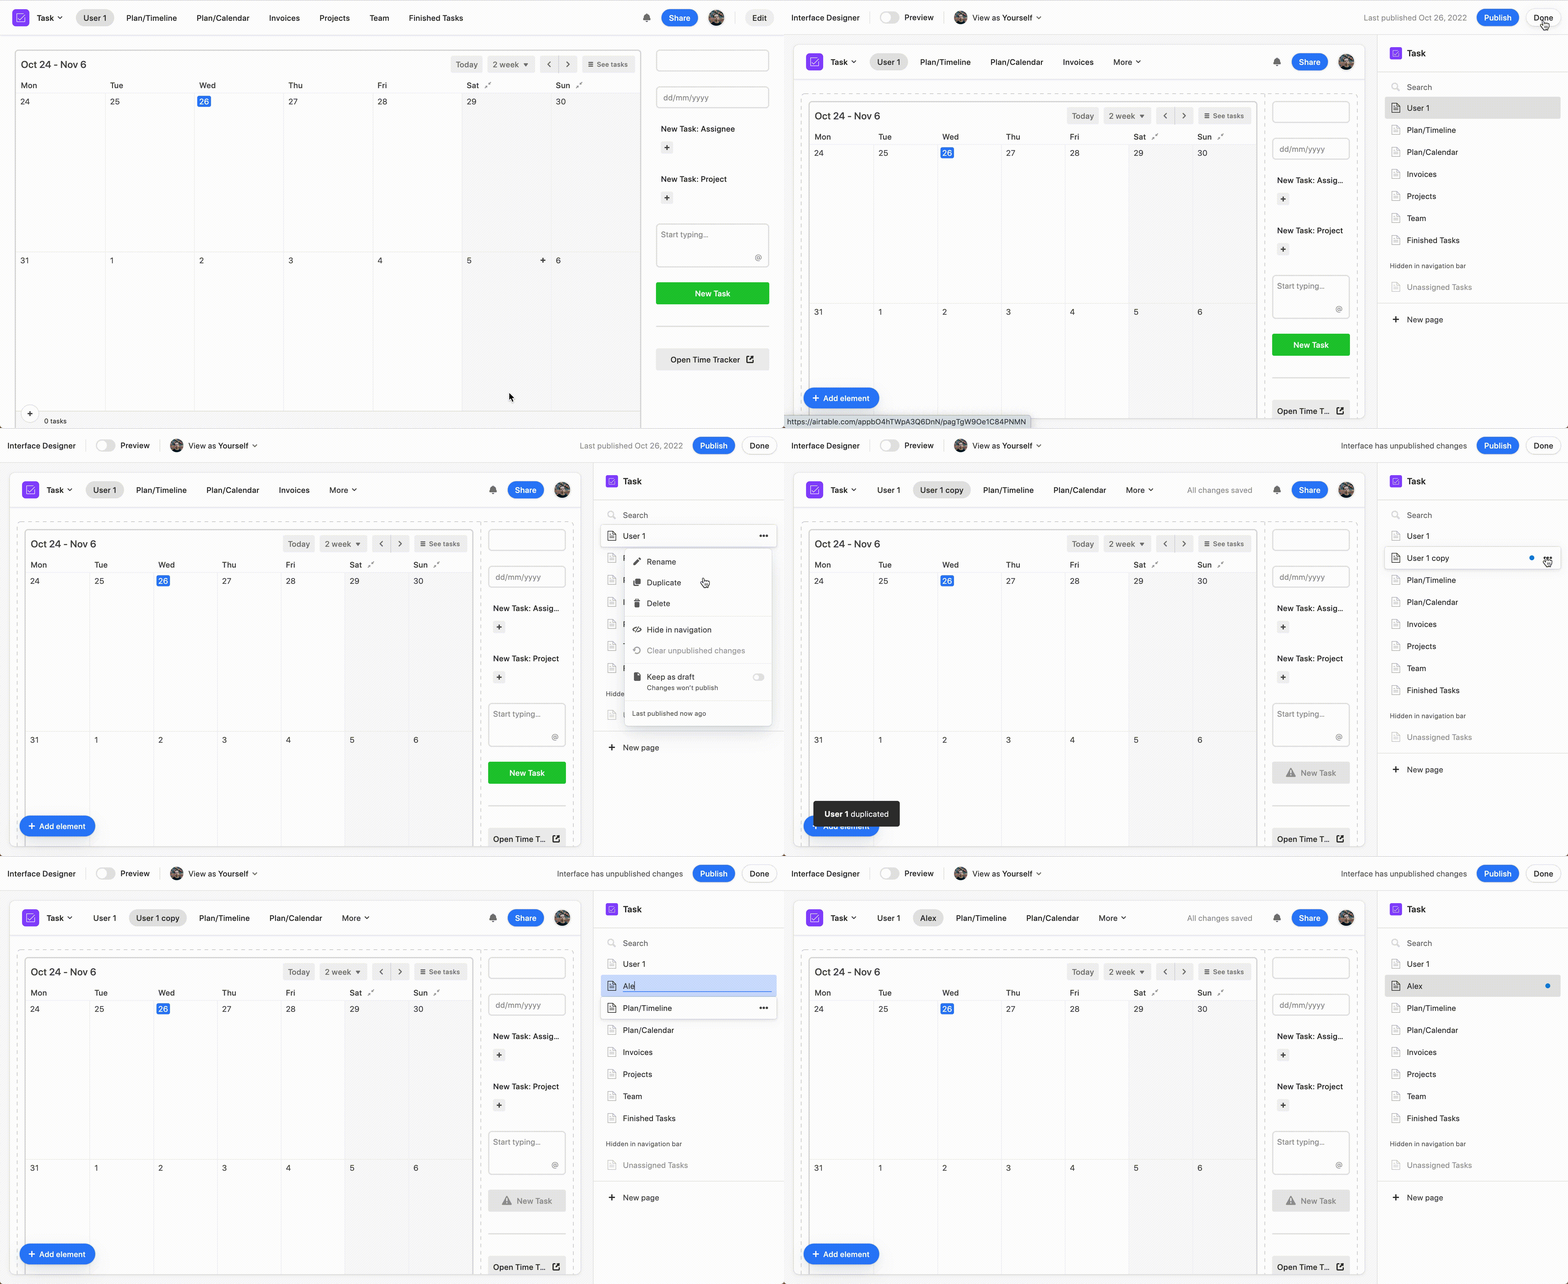
- Start editing the Interface (Creator's permissions required)
- Duplicate the default user's page (User 1) or any other existing user's page
- Rename the new page to the new user's name
Setup the user's interface page:
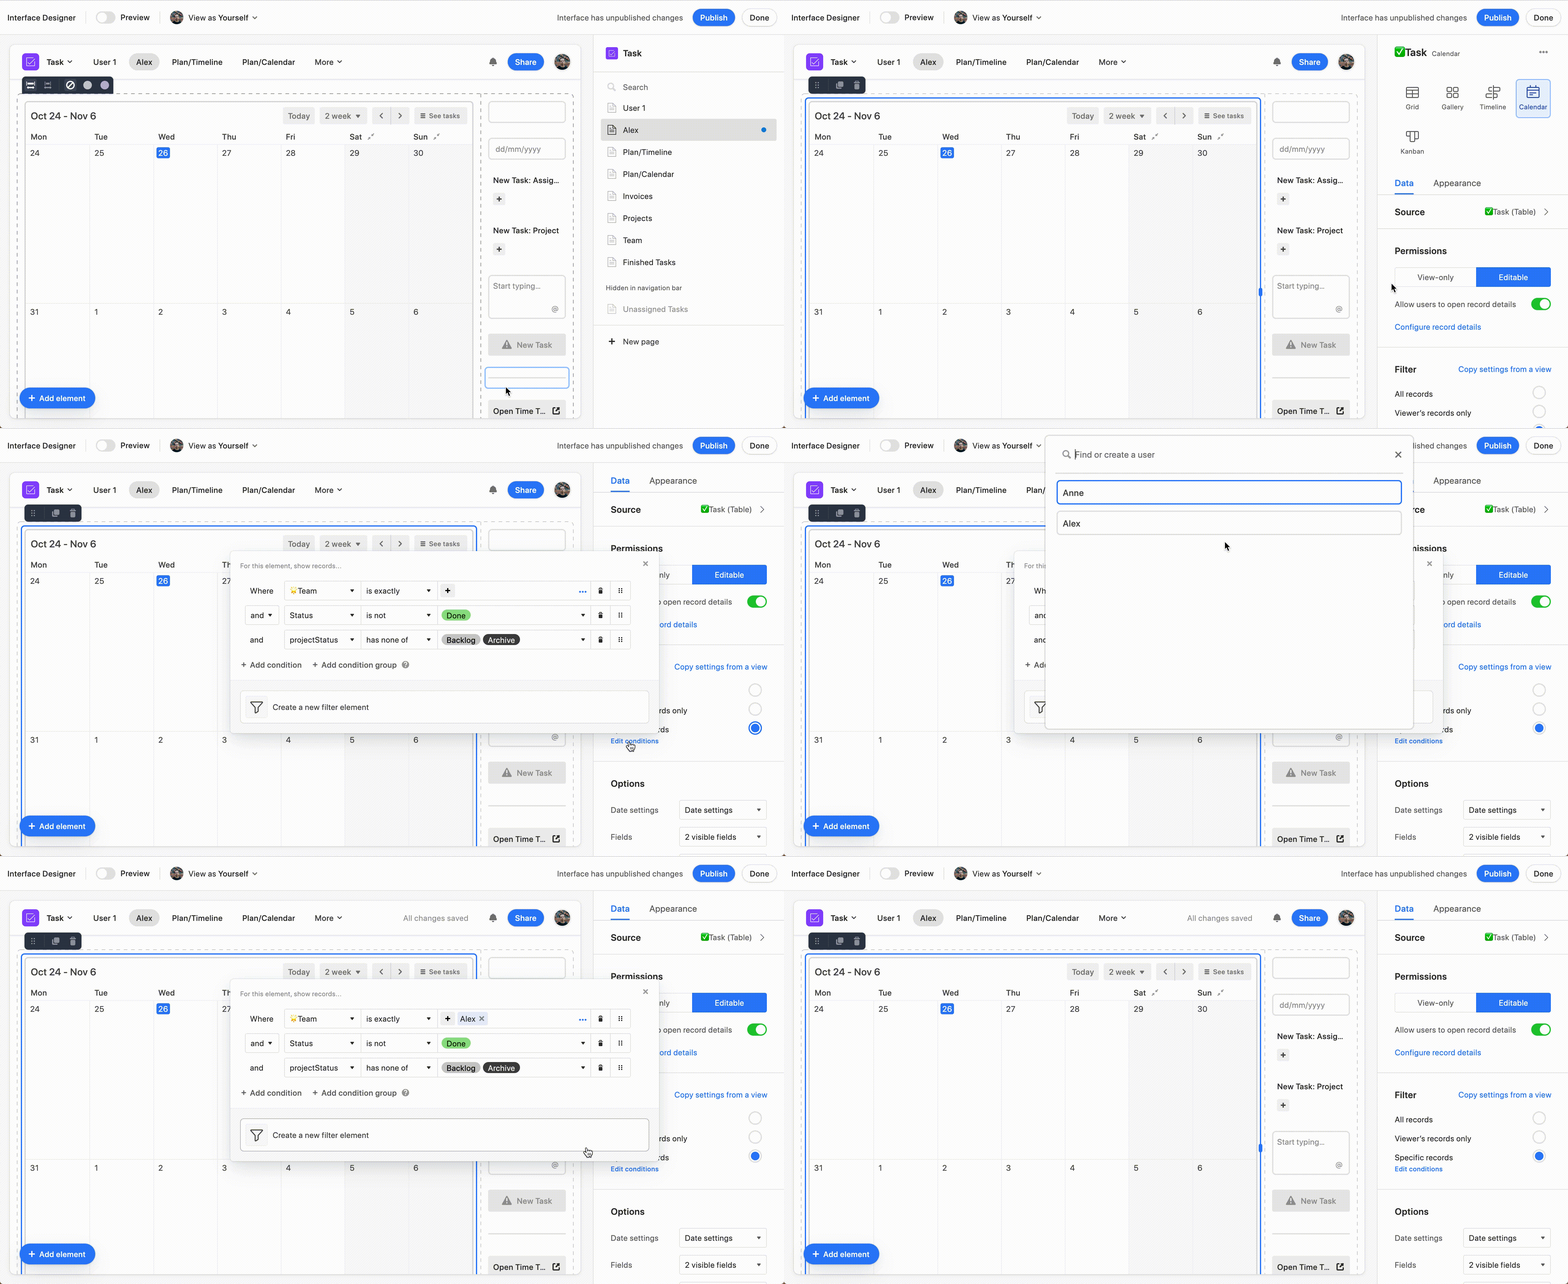
4. Change Calendar filter conditions
- Click on the Calendar element in the center and go to Filter -> Edit Conditions
- Assign the new user to the first setting of the Filter: **Team is exactly _____
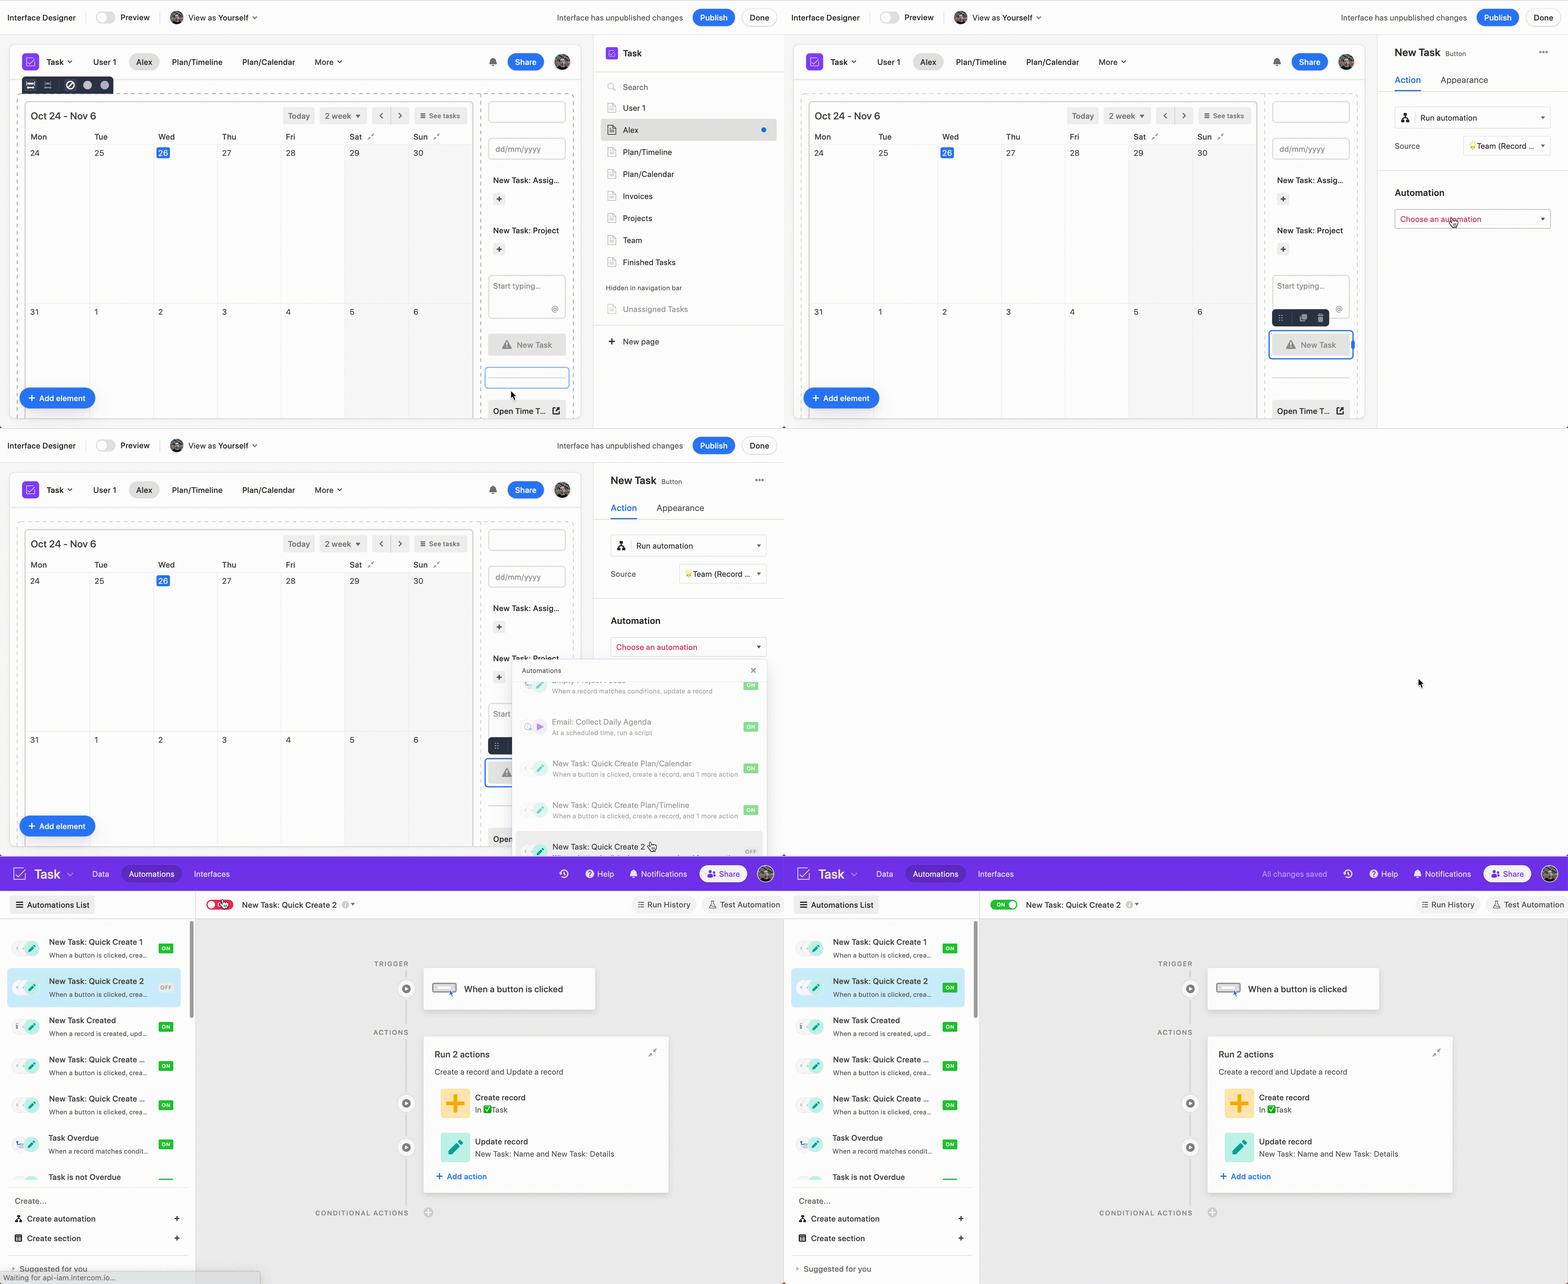
5. Setup New Task Button
- Click on the New Task Button element to the right of the Calendar
- Click the Automation dropdown list, and select the automation created in the Step 2 above
- If the Button is not active yet, you might need to turn the selected activation on - just follow the link provided in the interface
6. Setup User Profile selector and save the changes
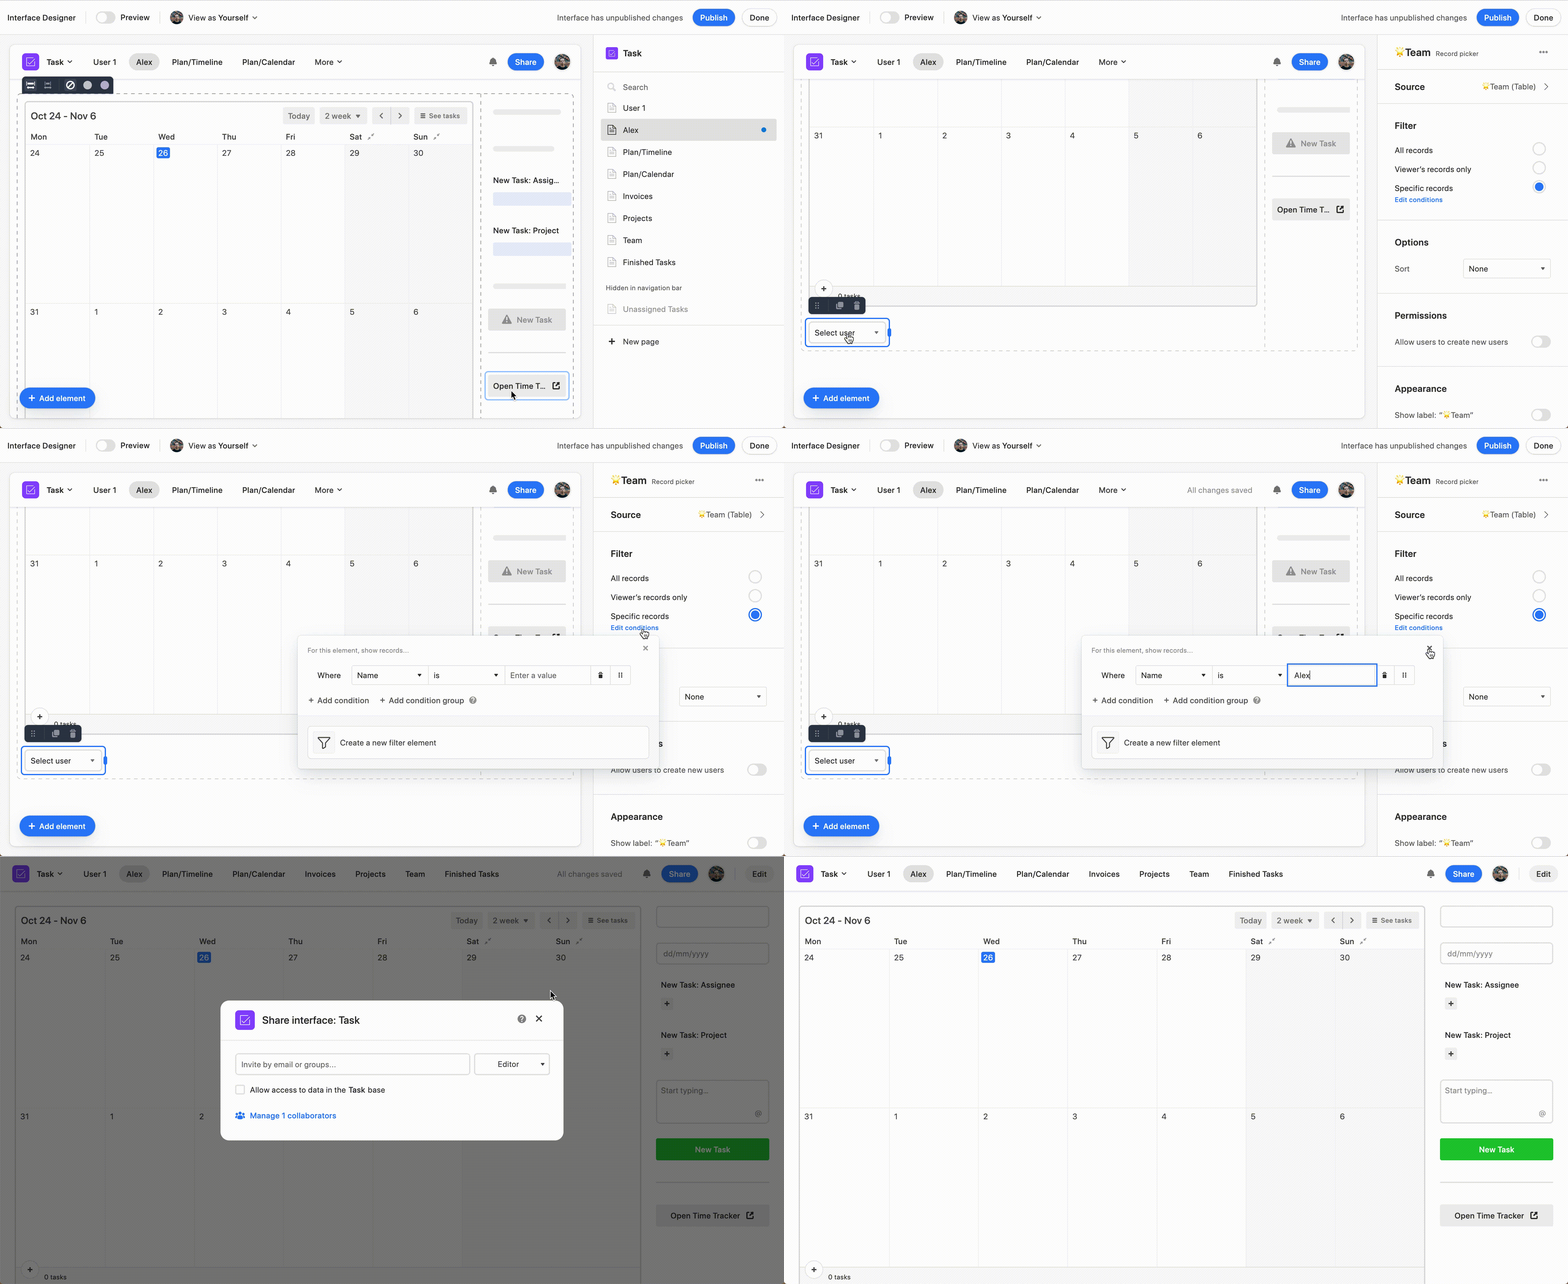
- Scroll down to the "Select a user" dropdown in left bottom corner and click on it
- Go to Filter -> Edit Conditions
- Type the new User's name in the Filter's condition:
Where Name is ___ - Click Publish to finish editing the interface
- Close the sharing pop-up
